A few weeks ago I read an article on reddit that it was the 25th anniversary of the Zelda series. I play games but not that many new ones lately. I still love the classics and can’t decide which is my favorite, A Link to the Past or Super Metroid… Anyway the article was hosted here and mentioned a “sequel” for the SNES zelda that I had never heard of, so I thought I would give it a try.
It was apparently only available in Japan in the mid 90’s via Satellaview, which required an attachment to the SNES that let the console play games it received via broadcast satellite. The game is called “BS The Legend of Zelda: The Ancient Stone Tablets”. The game itself and apparently other derivatives of the first NES zelda are available at http://bszelda.zeldalegends.net.
BS Zelda has a very similar overworld map with a few differences, completely new dungeons, at least one new item that I’ve seen so far (the weak gloves) and a few other game play differences. For example there are random weather events, random health boosting, you can turn while running with the pegasus boots, and there is a conversation bar at the bottom of the screen where some characters in the game appear to be having a discussion.
I thought this game was okay, but it just doesn’t feel like the original SNES Zelda to me. It’s probably lacking a lot of the intended experience since it can’t actually be played live any more. It was worth checking out though.
Originally when I was working on the Wiimote part of my touch table, I was tired of needing a mouse. I wondered if I could harvest a touch pad from an old laptop to mount on the edge of the table, and as it turns out, yes!
However, I ended up using the laptop and needing the touch pad again, only now I might need it for both projects. So, I wanted it modular and USB. Apparently some old laptops use PS/2 to communicate with the touchpad. I discovered that information here, which is also the source for most of the knowledge needed to do this mod.
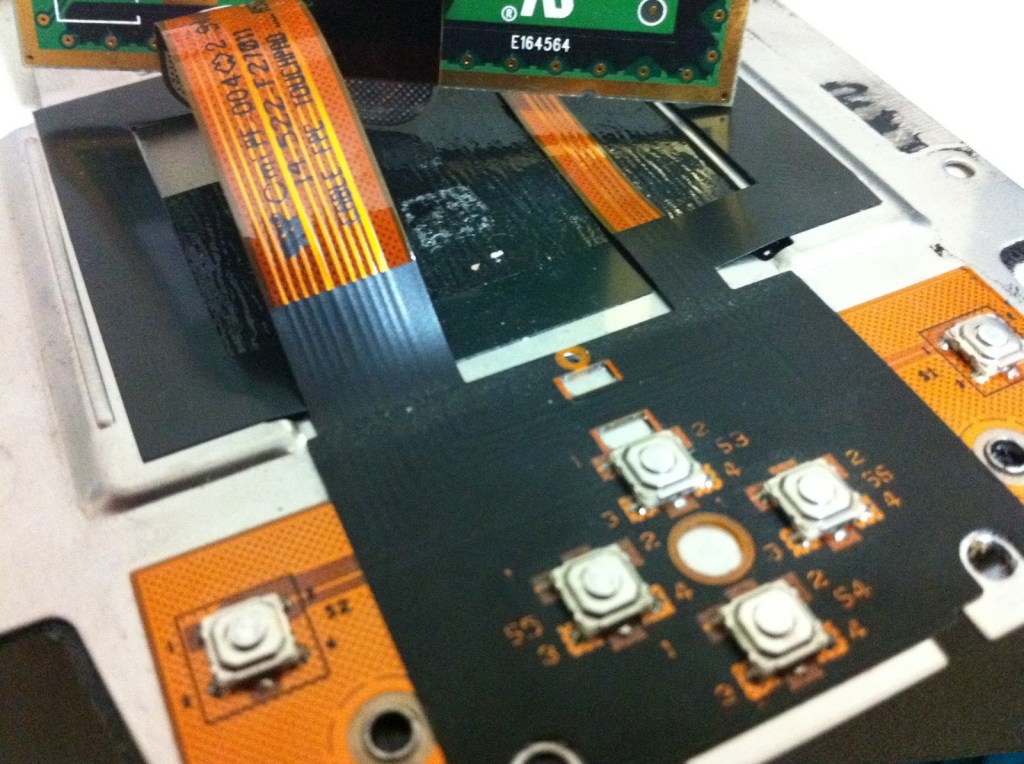
According to the Sparktronics blog, my touch pad IS one of the ones that works via PS/2. It is a Synaptics T1004. You can’t see that on my chip in the photo, nor can I see it with my eyes now, but it was visible before I started messing with it.
I was able to follow the wires inside the cables back to the chip as shown on the Sparktronics blog, and they did in fact match up.
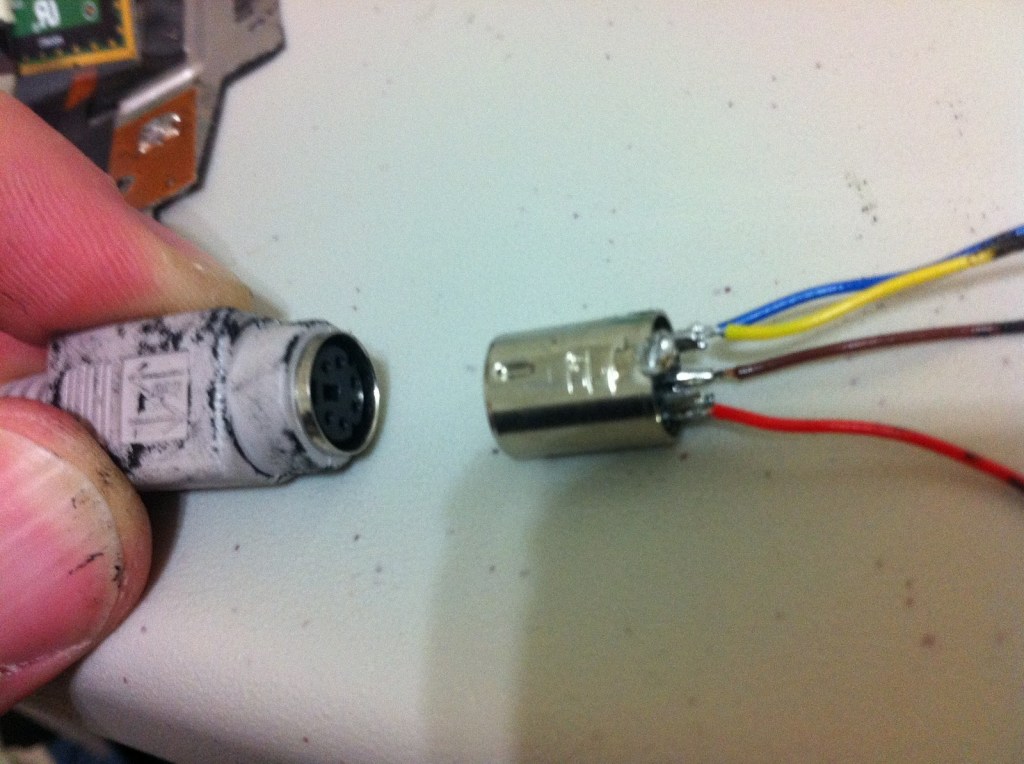
I cut the male end off of an old keyboard, pried out the metal connector, and soldered some wires to the BACK side of it. You can see how the end result will plug into a PS/2 port. It is possible my wire colors are not appropriate, so if you are doing this I would not use them as a reference.
I also soldered the appropriate wires to the PS/2 connector on the touchpad – the connector by which it was plugged into my laptop’s motherboard.
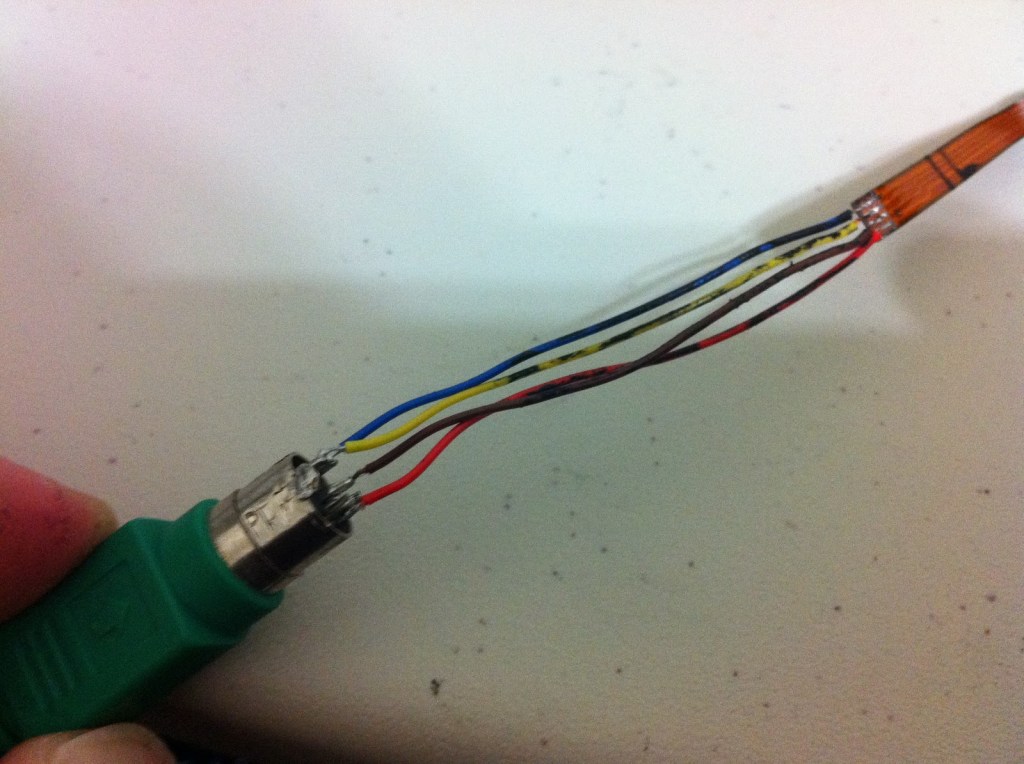
There are some other diagrams available on the Sparktronics blog, but ultimately it came down to this:
Now to conver to USB – it is easy to use a USB mouse on a PS/2 port and the adapters are fairly standardized, but to go the other direction and use a PS/2 mouse in a USB port requires hardware translation. I think I have read it is only a matter of the clock having to be translated, but either way it needs to be converted. Some keyboards and mice supposedly already contain this clock conversion hardware and it can be used as necessary, so any cheap adapter will work, but in this case I am certain my device was never intended to work over USB. So, I ordered an adapter that was sure to convert the clock. Still a cheapy from MonoPrice, but it does the job.
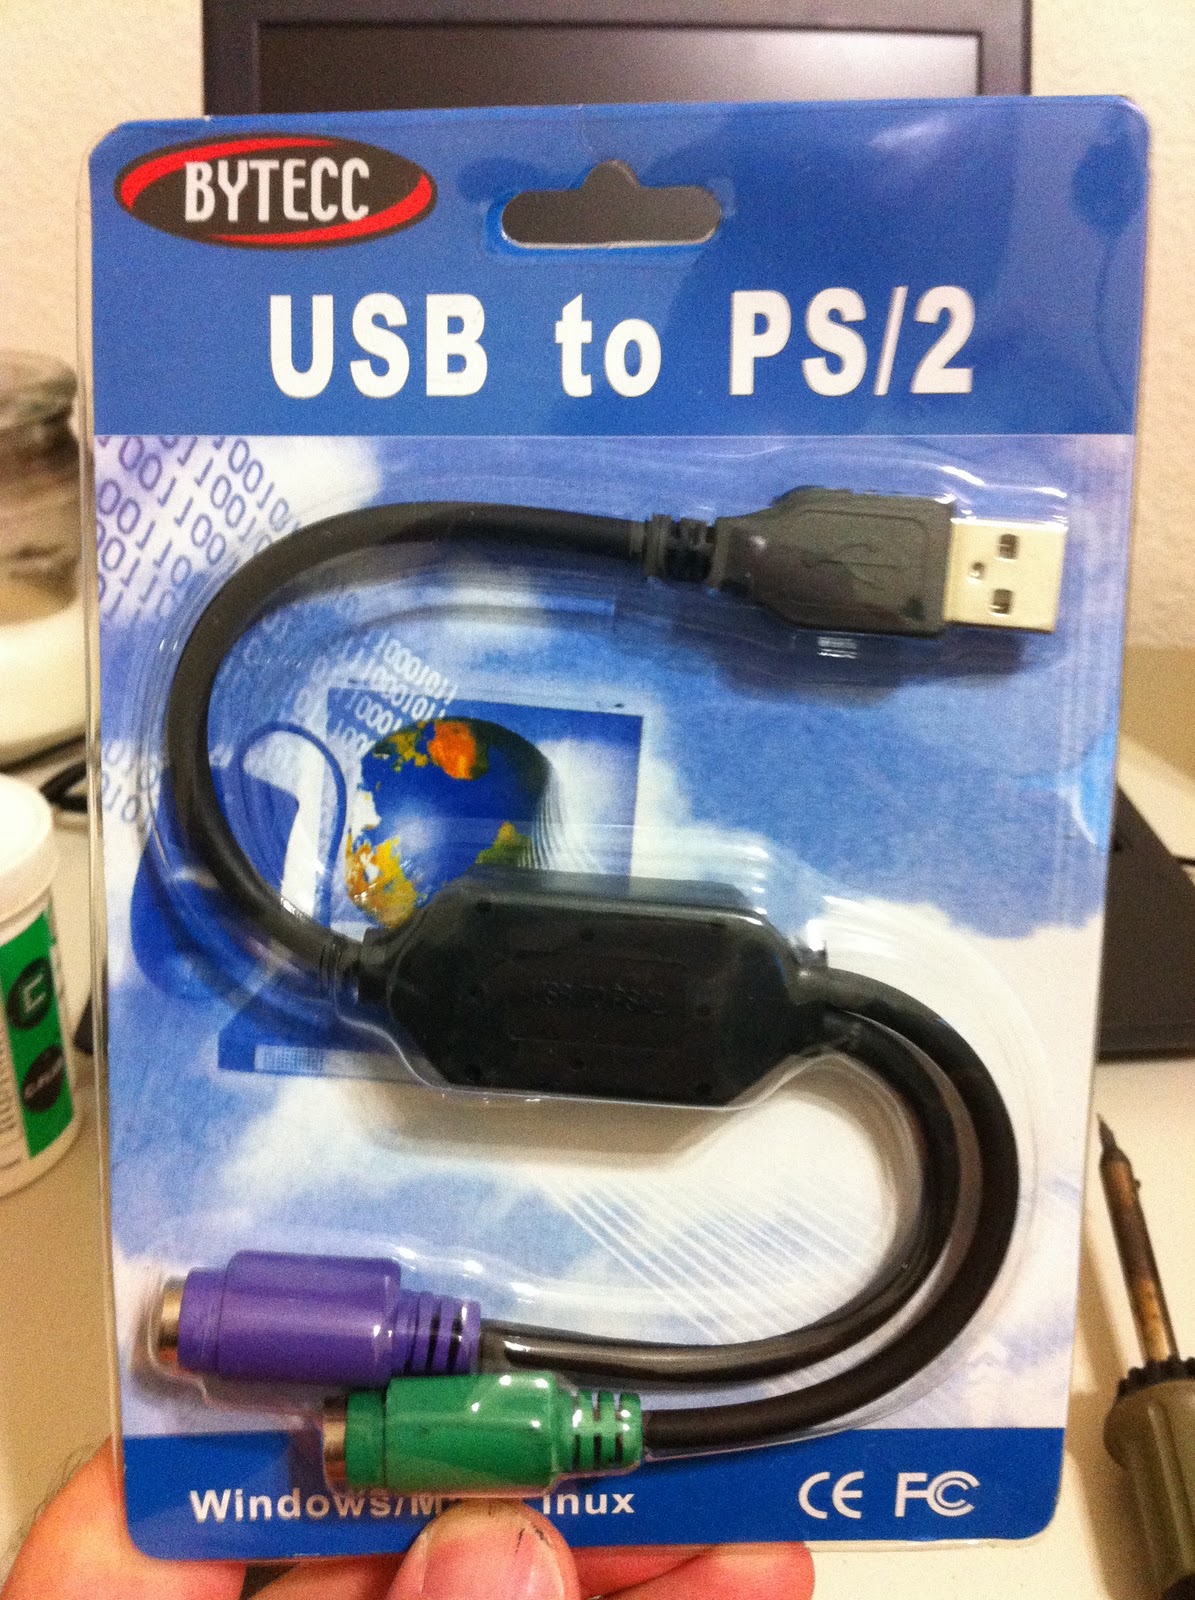
Once everything is wired up, the end result looks like this:
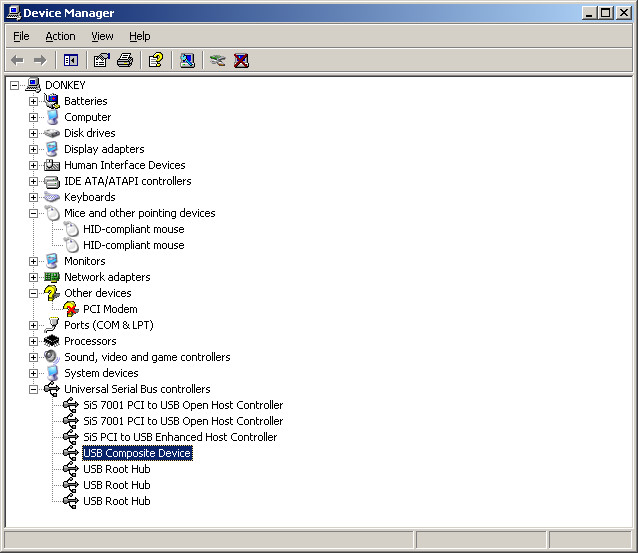
At this point I had previously tested the concept and used it for another project, minus the USB conversion though, so I was still curious if that would work. Windows did find the adapter, and following that it found the pad itself.
After the devices were found, everything worked. The only down side is that the Synaptics software that came with the laptop cannot find the device over USB. This means I cannot customize what the buttons do using that software, but that is not a huge problem because AutoHotKey can be used to do that anyway, and in a much more powerful way. Check out the test video:
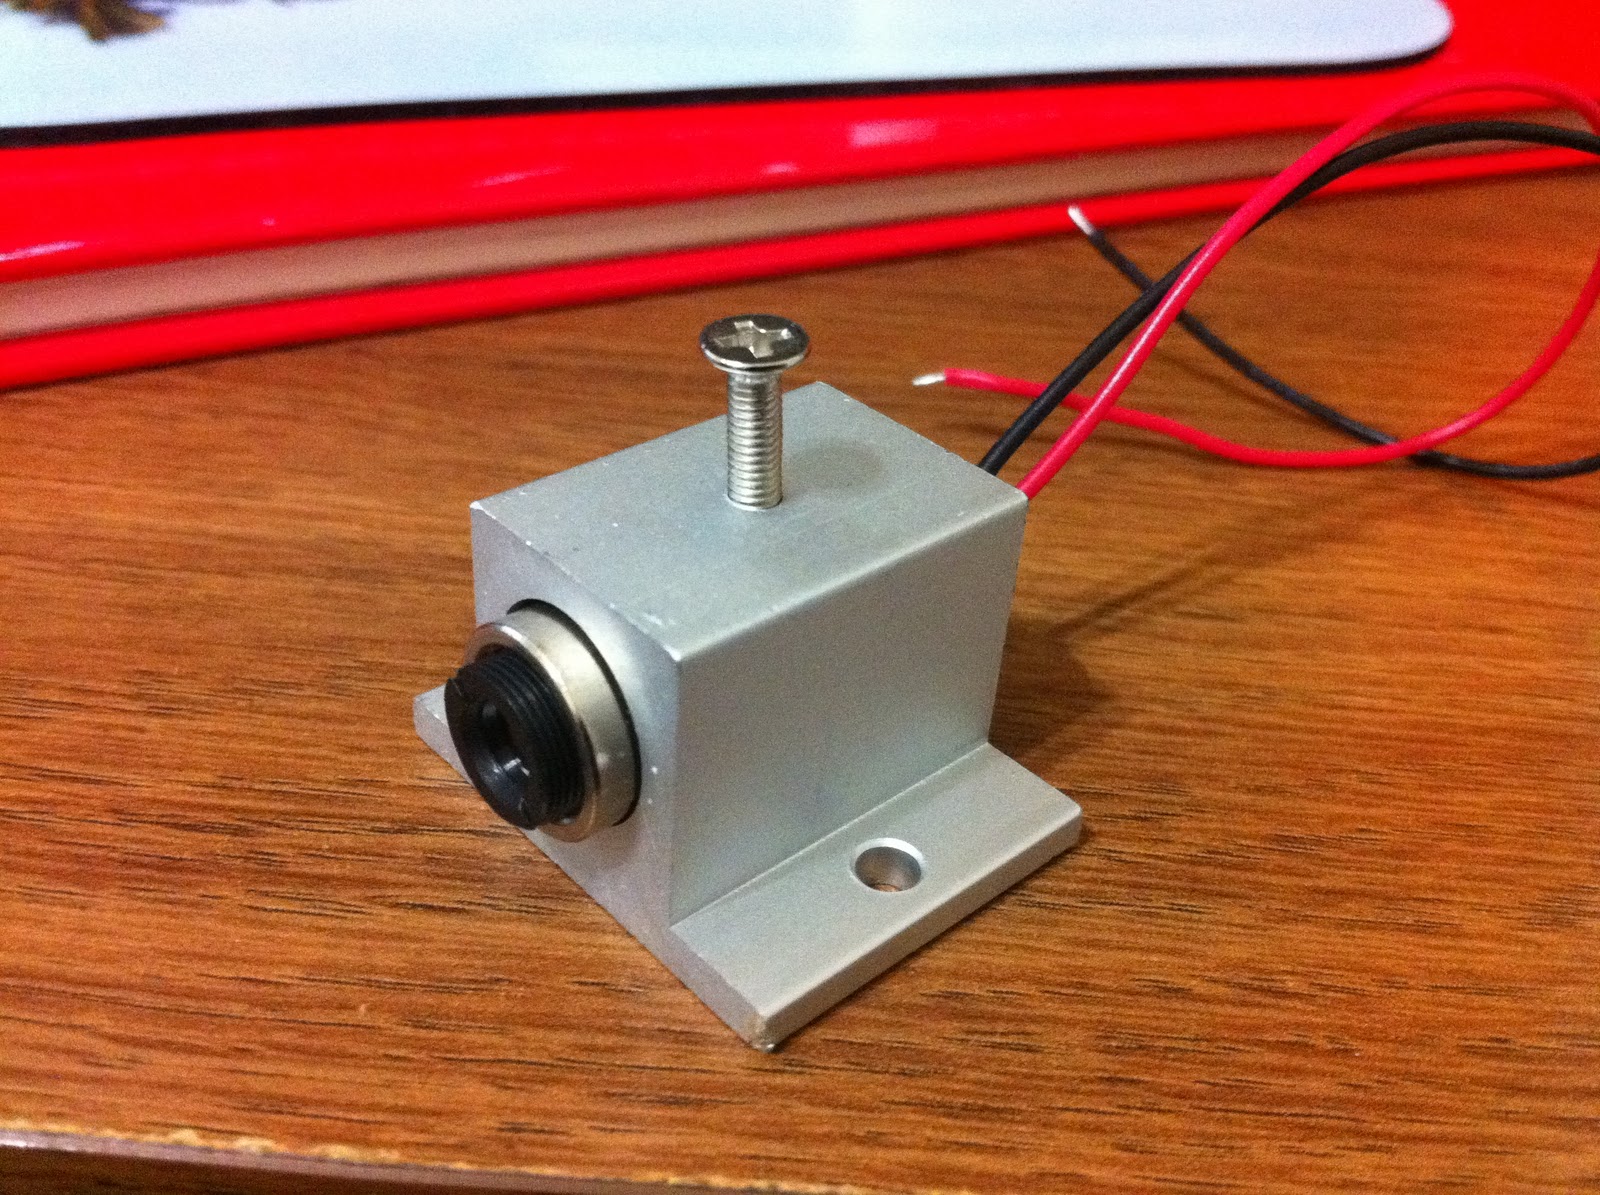
Progress has slowed on the multi-touch table, too many projects I think, and it’s probably time to clean up my workspace a little. I did get my laser mounts from Aixiz. They were made specifically for the 30mm Aixiz lasers and they were $3.50 each. I need some shorter screws for them though, the supplied ones are a little tall.
UPDATE: These mounts really didn’t work out. The single screw in the center causes the lasers to tilt up or down on one end or the other. Turns out zip ties are actually much better!
*** I was never able to solve the problem of filling up the memory when using EWF, needs either more research or more memory (with the understanding that reboots will be mandatory periodically) ***
*** You can skip most of these items if you have a CD-Rom attached to the computer that is getting the CF card, go straight to installing windows onto the card, and finish by completing the EWF instructions (IF you want EWF) ***
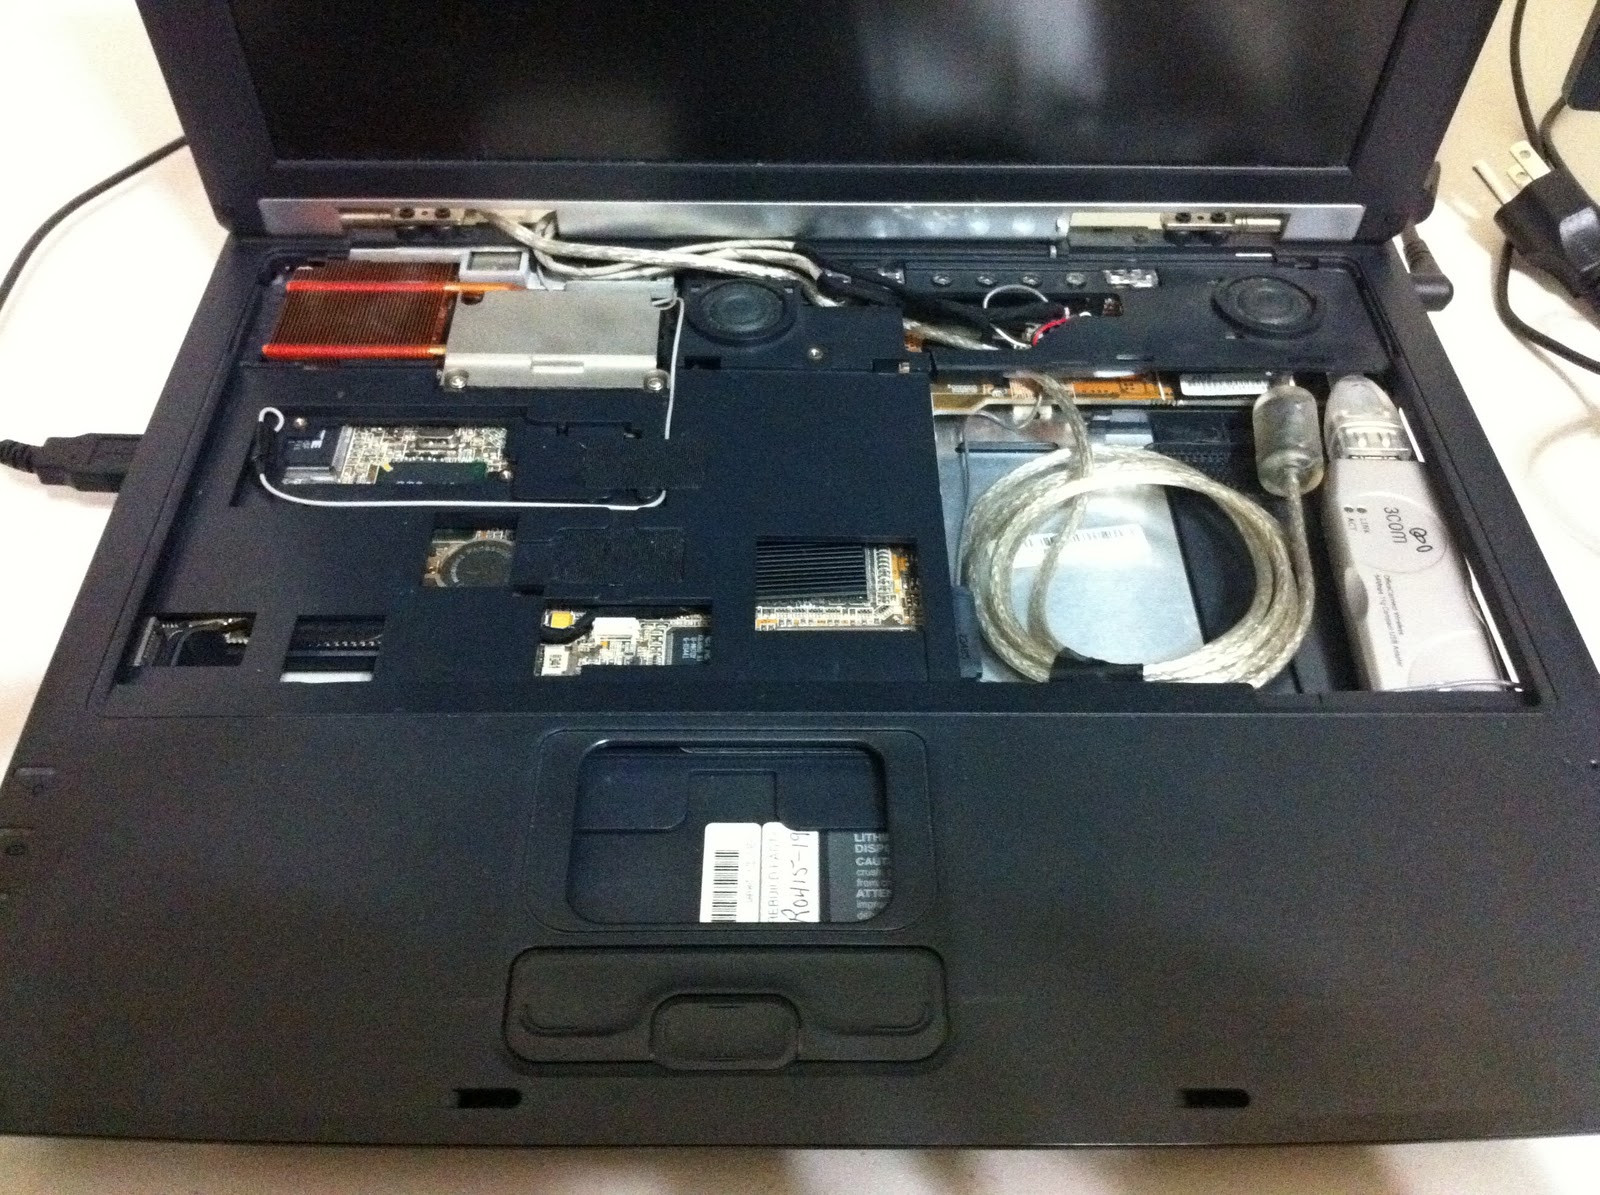
I have an old laptop that I have used on and off for small tasks for several years. It is an Athlon 4 1400+, ECS Balance A535, and was thrown out in 2005/2006 as bad at the company I worked for at the time. I don’t remember the reason, at least one of them was that we couldn’t keep a battery in it. Over the past few years I have repaired it repeatedly (though haven’t tackled the battery issue yet). I have:
Flashed the BIOS with a Chinese version (I believe) that uses the CPU fan less aggressively – I wanted to use it in class at the time and the fan would spin up/down, up/down…
Removed the original PRISM wireless card after wasting several days trying to make it work with Ubuntu, and installed a 3Com 3CRUSB USB wireless adapter
Removed the CD/DVD DRIVE (it was broken anyway)
Replaced the broken hard drive with a 4GB CF card using CF to IDE adapter
Removed the touch pad (for use in another project, will find its way back as modular)
Upgraded the memory to the maximum of 512 (plus internal 128 = 640)
I had been reading about the Enhanced Write Filter from Windows XP Embedded, and wanted to give it a try. EWF acts like a buffer/cache that sits in front of an HD and lets everything get written to itself instead of the drive, until it is told to commit the changes. I previously had the CF card loaded with XP, but I was worried about constant writes ruining the flash memory, and there was also an intermittent delay writing to the card. Since I recently thrashed my OS on this machine, I was able (unfortunately) to start from scratch using the CF to IDE laptop adapter and the CF card. In the picture the card is hooked to an IDE-USB adapter for testing.
Tools needed:
USB Thumb Drive (because my laptop does not have a CD drive) HP DriveKey Utility
boot98 or boot98se – DOS/Win9x boot disk (old School)
Windows XP CD (i386 folder)
Partition Magic 8 (reeeeal old school… you may have a better way of formatting your drive correctly, I’m sure some Linux partition tools would work well)
smartdrv.exe
First, use the HP DriveKey Utility to format the thumb drive as bootable. Mine is version 2.1.8, I’m sure others would work. Choose FAT, just vanilla FAT16. Everytime I make a new bootable flash drive I forget that FAT32 causes problems. This will limit you to 2GB, but that is more than enough.
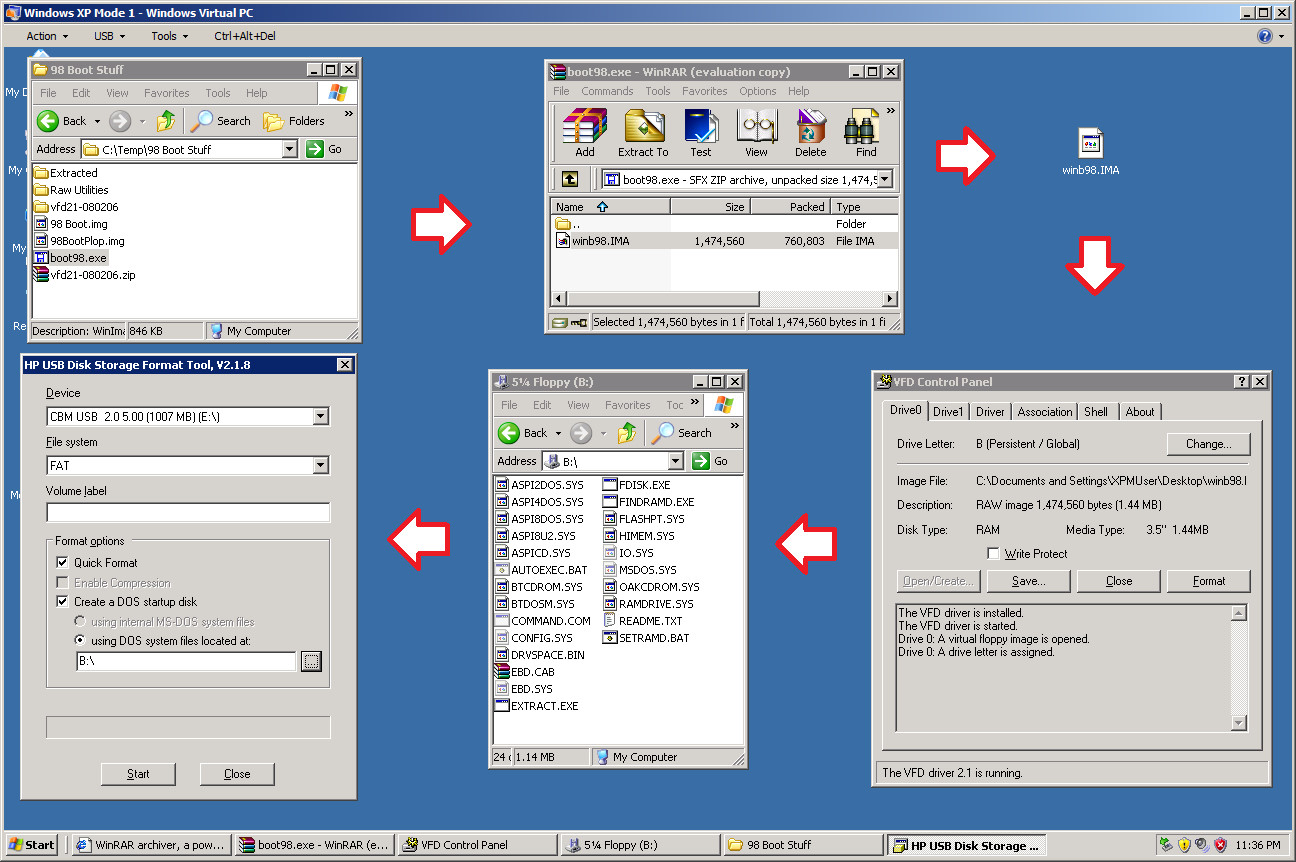
Next, extract the files from boot98 or boot98se. You can get those images here or get the files by other means. If you don’t have a floppy drive, like most people, you may have to jump through a few hoops to extract the files. Both “applications” want to extract to a floppy and make it bootable, but you can open them using WinRAR (even though they are EXE) and mount the IMA that is inside as a virtual floppy disk.
You can skip the WinRar step if you don’t care what’s in the EXE and you make an empty virtual floppy disk.
If you have an OS after XP (likely), you will need to do any rendition of this in XP Mode. After you extract the IMA, open the VFD tool, install the driver, start it, do “Open/Create” on Drive0, select your IMA, and set the drive letter to B: (or A: if it is available). When you run the HP Drive Key tool to format your USB key, tell it B: as the location for system files, then copy the files it didn’t retrieve from B: to your USB drive.
Now delete the AUTOEXEC.BAT from the USB stick, it’s not running anything we need, and edit CONFIG.SYS to only keep these items:
Copy the i386 folder from your XP ISO or CD to the USB stick. Copy the contents of Partition Magic’s PMDOS.cab file to a folder on the USB stick. Copy the file PQPB.rtc from the root of Partition Magic’s setup files.
Next copy EWF’s files to the USB stick (or otherwise get them to your CF card). I found this site, and it didn’t really work for me. I tried, but I kept getting errors trying to enable EWF, but it does explain the inner workings. What DID work is the pre-crafted package including reg entries and batch files from RoBoard. I have no idea what their actual product is, but I downloaded the 100 XPe package, and it definitely does the job. Great instructions included. I followed them exactly except for HORM. HORM lets you hibernate the machine, and always boot up from some default saved hibernation state. This will not work for me because I have only 512mb of memory, I suspect that’s not enough to safely hibernate and save all files to RAM.
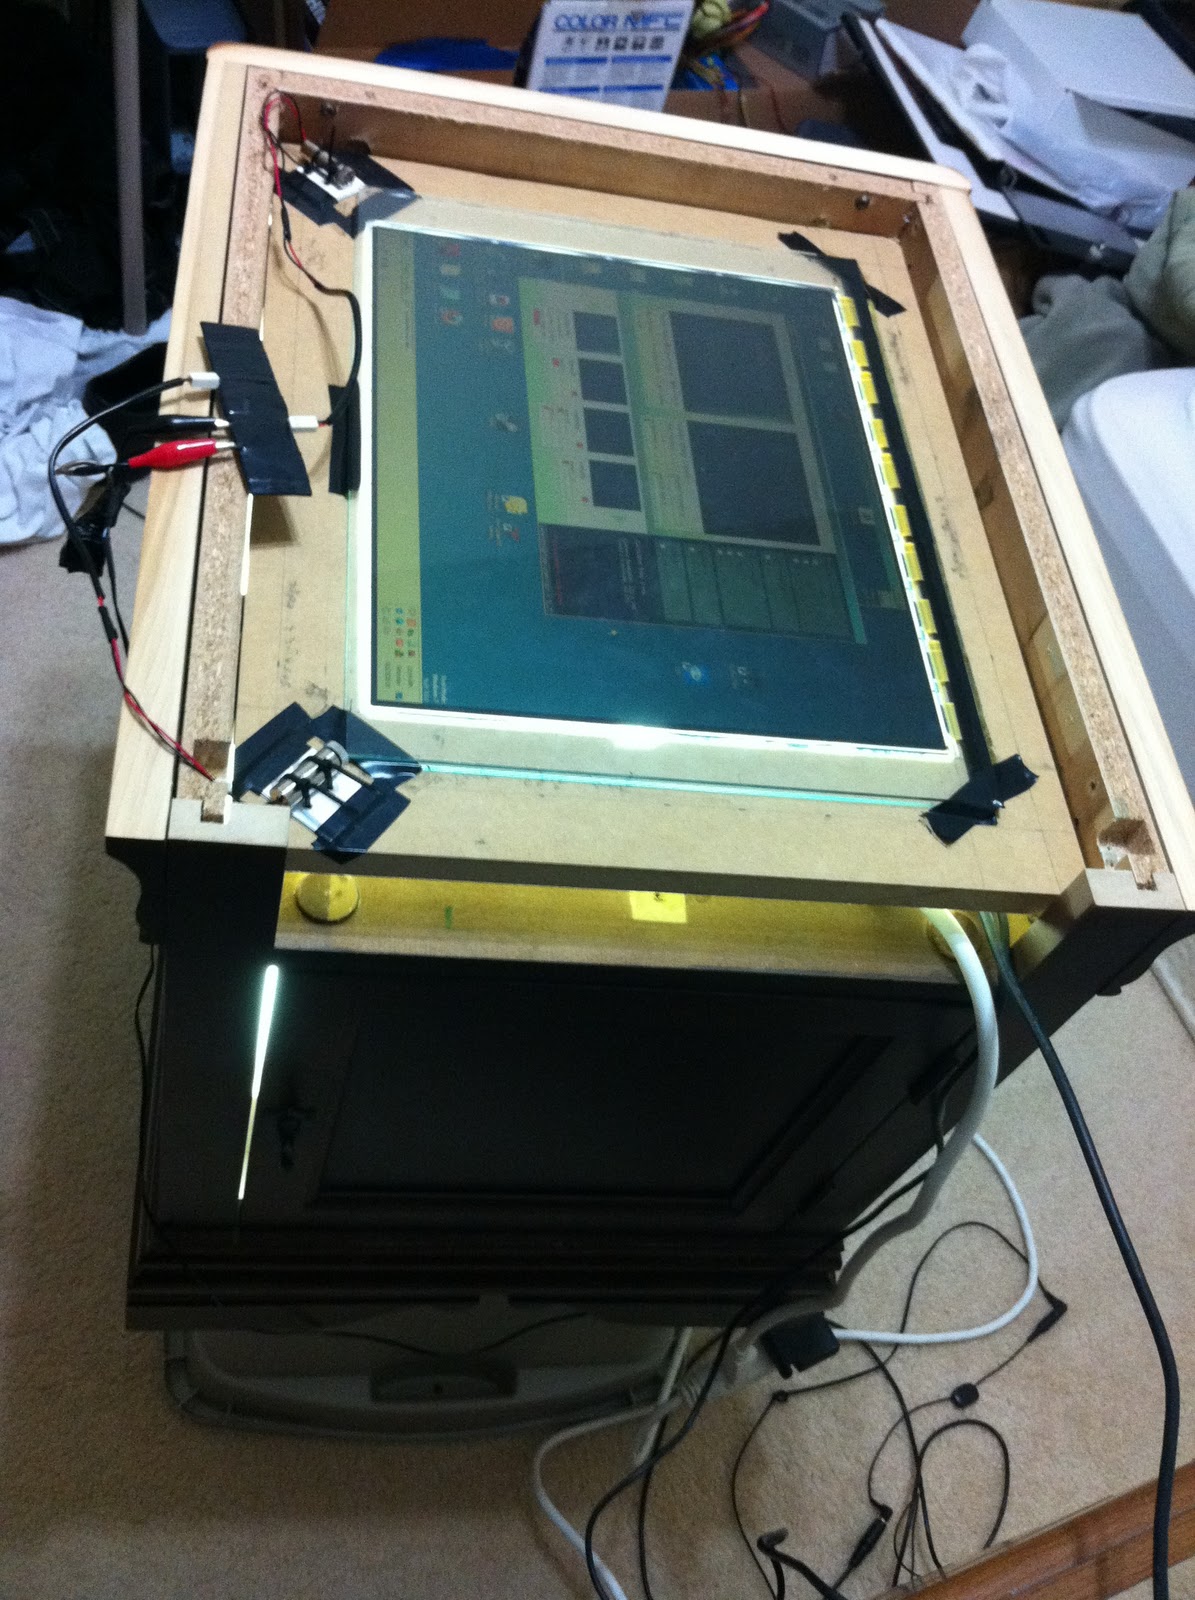
Now for some action. Boot the machine with CF card attached:
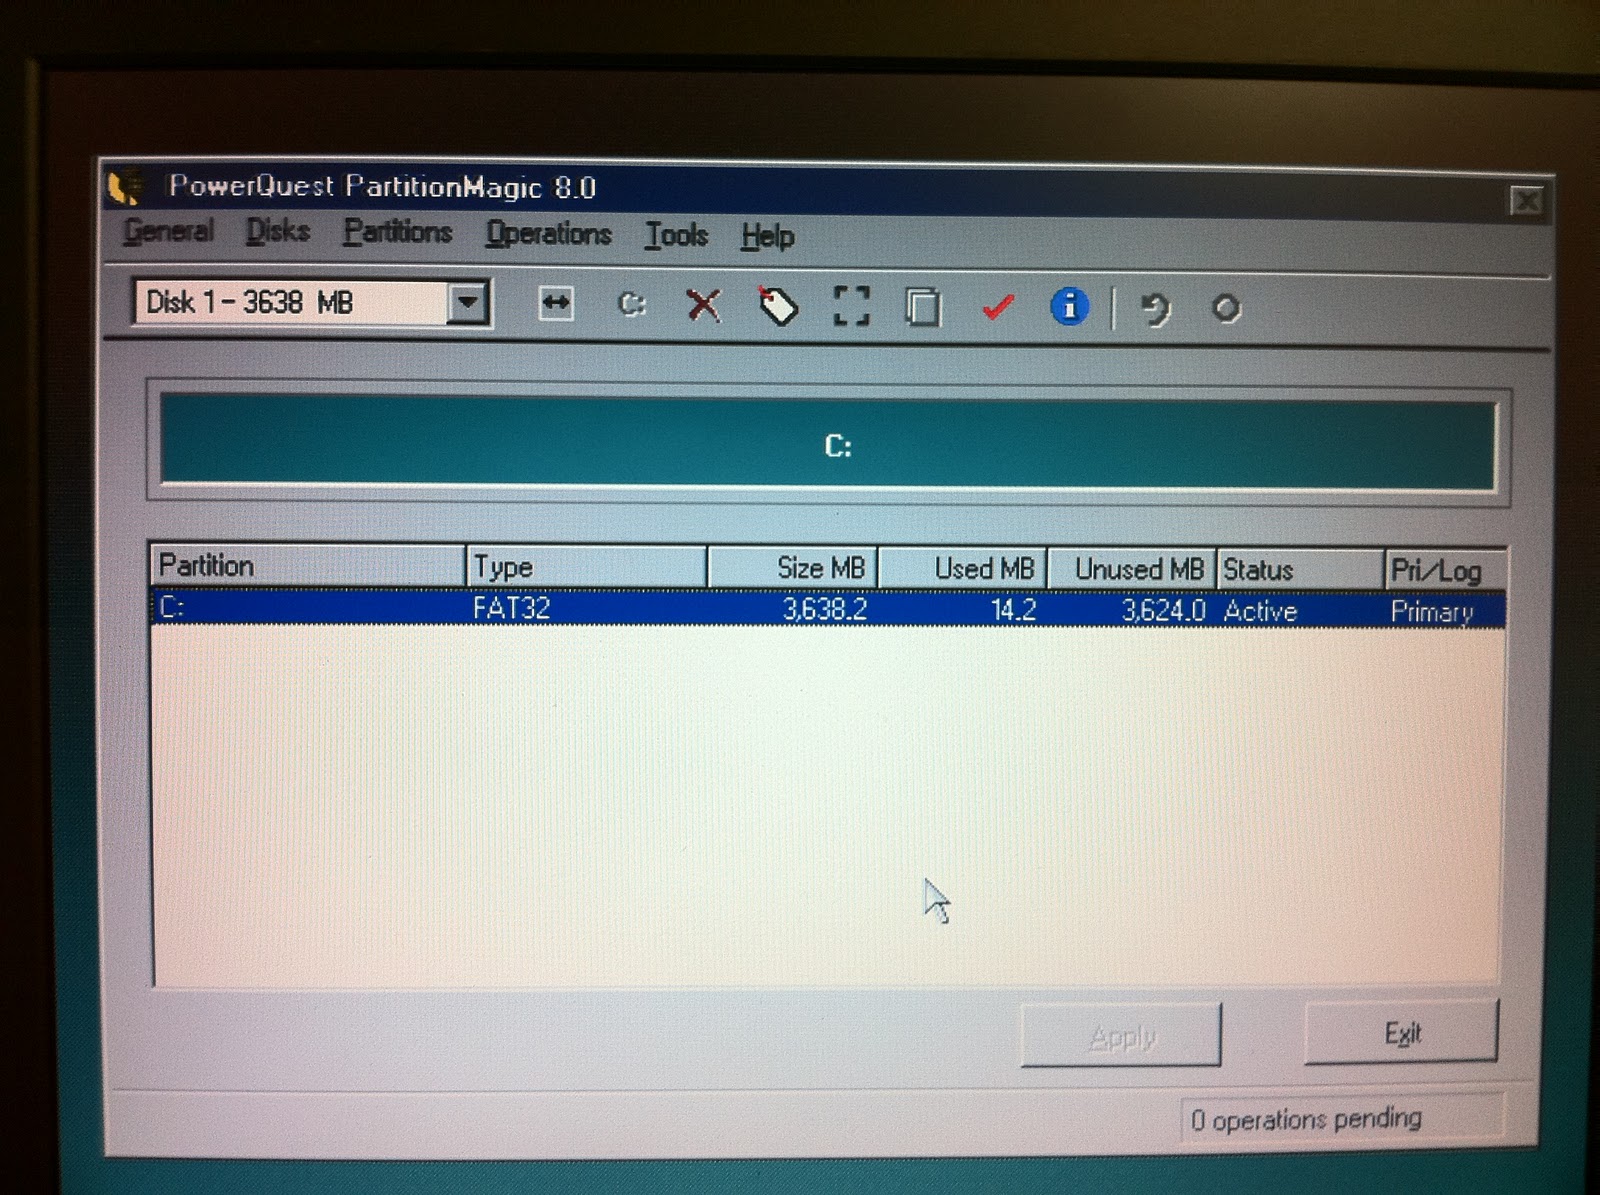
Load partition magic (PQMAGIC) and partition, format, and set the drive active as FAT32 (not NTFS):
Reboot, and run smartdrv.exe. I don’t know where to tell you to get it, this site has it but it doesn’t look maintained or permanent.
Change to the i386 folder and run WINNT, this is the setup program for the DOS installation of Windows XP. If you didn’t load smartdrv you’re about to be in a lot of pain. And by pain I mean waiting. Horrible waiting. Also note that DRIVER.cab is the LARGEST file in the extraction process. Even with smartdrv it will trick you into thinking your installation has stalled out. Just let it sit.
Finish the XP setup, when it is complete, DISABLE VIRTUAL MEMORY, it can’t help us anymore since everything is already being written to RAM. You may also want to disable System Restore and sleep/hibernate but not required. Follow the RoBoard instructions. The only instance of “engrish” is found in the naming of the batch files, no big deal. They will have you rebooting several times, then in CMD you can run “ewfmgr c:” and see the results:
Now you have a read only OS. Unless you type “ewfmgr c: -commit” of course. I disabled the shutdown command on the start menu using group policy, and I am using a batch file to run the commit command followed by a shutdown command so that all changes are committed on shutdown. Commands:
ewfmgr c: -commit shutdown -s -t 00
Group Policy option:
There was a HUGE boost in speed! This laptop is actually fast! It should be, the slowest part in the system has been bypassed. It is still bad at playing flash/youtube videos though, but is about 15 seconds faster during boot time. For the test, I just haphazardly threw some stuff in the startup folder: Recycle Bin, My Computer, My Network Places, My Documents, IE6, Windows Movie Maker, Google Chrome, and Paint 🙂
In keeping with the theme of every post being out of order, here are some videos of the near beginning of the touch table building process. I say “near” because I first built an MTmini as a test. I later found a whole bunch of information about people using Wii remotes as cameras in order to use any surface/screen as a “whiteboard”. I built an IR pen (IR LED + a battery in a permanent marker casing) and bought a Wiimote and a Bluetooth adapter. I had already seen the actual multi-touch implementations at NUI Group and wanted to build one, but I was hoping to include the Wiimote Whiteboard concept.
Experimenting with Google Earth and Solitaire using Wiimote Whiteboard
This video is dark and poorly recorded, but you can see the LCD components before they went in the table. If you look closely, you can also see the aluminum foil left over from my Romeo’s Pizza dinner. Printer paper is used as a diffuser layer. Also, Crayon Physics is an AMAZING game, with or without a pen.
Since the camera in my touch table needs to only see IR light, I had to first remove its IR filter so it can see EVERYTHING, then use DEVELOPED film negatives to block most of the visible light. This is a common tactic in the community, but now behold… a graph.
The film negative has to be exposed and then developed. I held it up to a fluorescent light for 30ish seconds to effectively take a picture that was all white. Then when you get it developed, the negatives will be all black. I had no luck at Wal-Mart, they don’t have a film processing machine anymore, at least not the one I went to. CVS did it, but they did not understand why I didn’t want any pictures and only negatives.
After about a year of planning, reading, and breaking things, I finally have a minimally functional table. There are a ton of issues but it works much better than expected at this point.
Specs:
~15-17 inch LCD
LLP (Laser Light Plane) method, two 10mw 850nm IR lasers from Aixiz via Peau Productions
CCV v1.3 (Community Core Vision)
PS3 Eye Camera
No original back light (currently), 2 fluorescent bulbs/fixtures from Home Depot, 15 watt “Cool White” 4100k
AMD Phenom 8650 3-Core (64-bit) 2.3 GHz, 4 GB Ram
Videos of the table, flash demos are from the CCV page at NUI Group:
Blob testing/tracking in CCV, success!
Photo application: (please pardon my sniffling and commentary…)
It was pretty hard to find an end table with a cabinet that looked decent. As it turns out, it wasn’t a very good solution because it’s difficult to use in every position. Oh well, it is a prototype.
Original back-light, not being used at the time of this post. The grid lines in the plastic cause IR scatter or blockage in some way. Clear plastic mirror clips are holding the piece of plexiglass to the wood face:
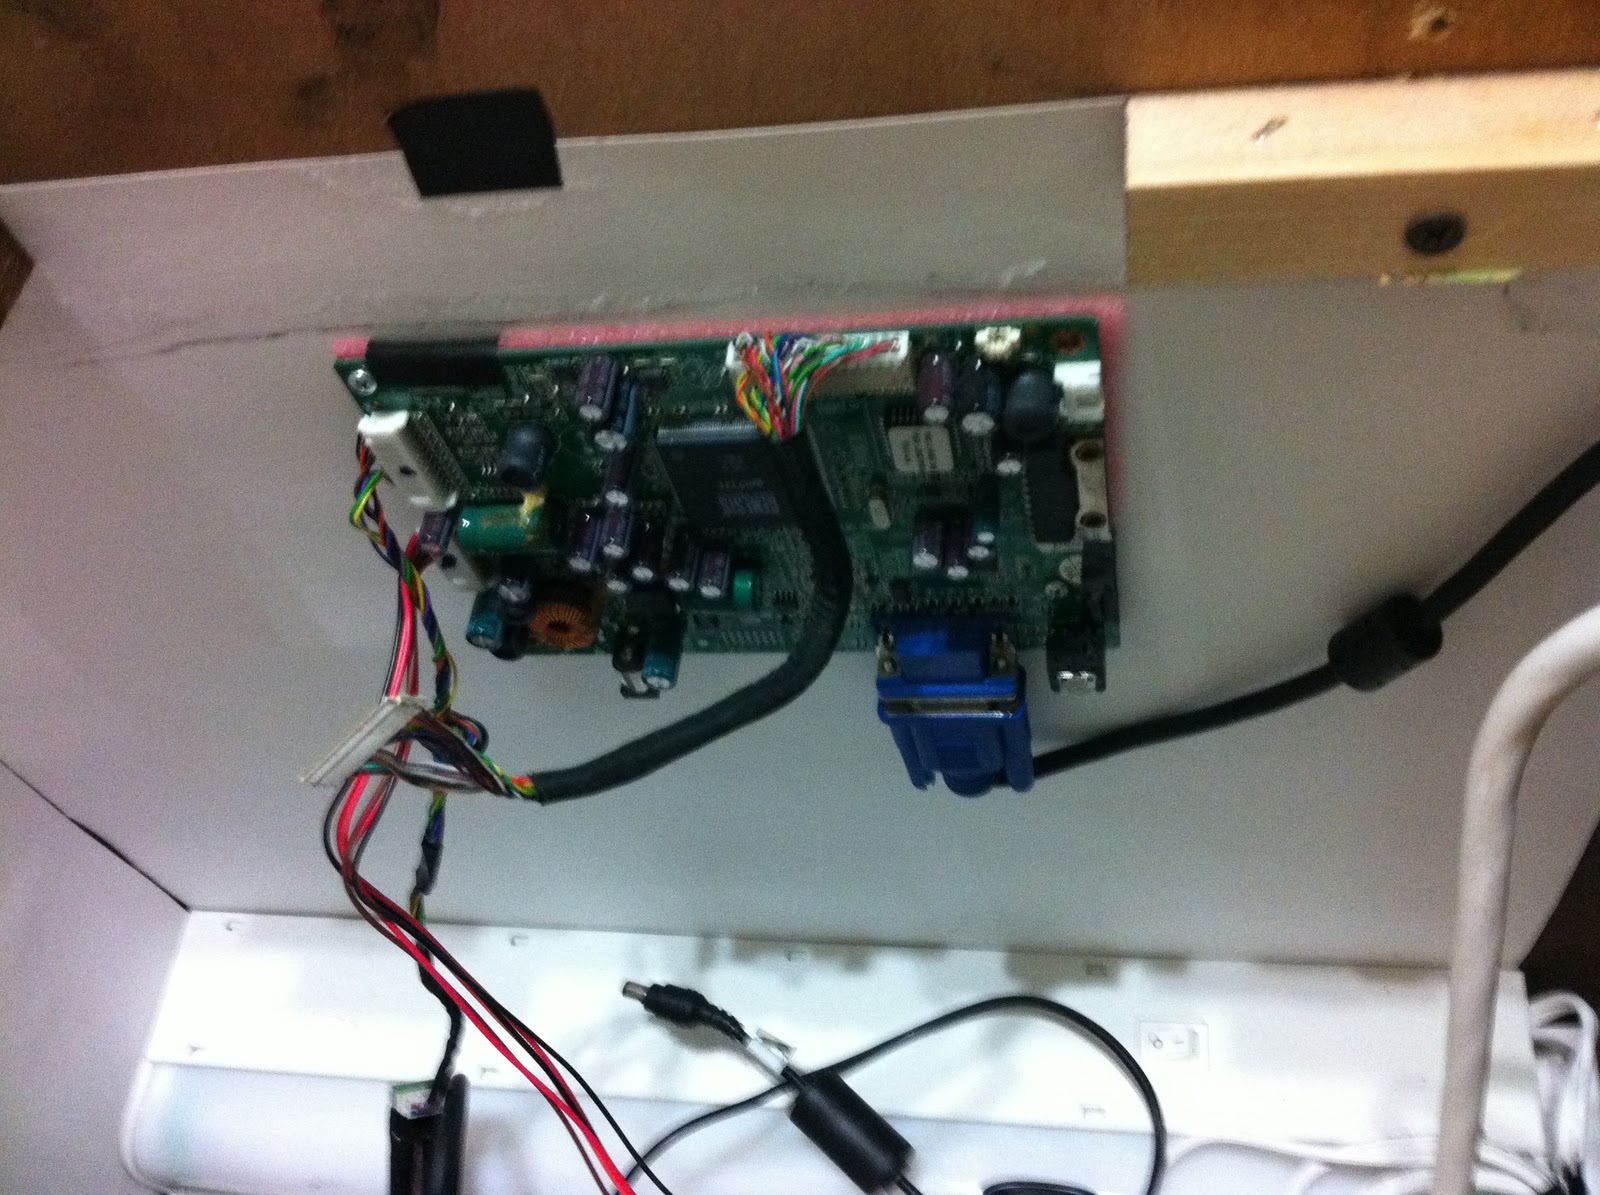
LCD mainboard, mounted to the inside of the end table: